搜索到
23
篇与
的结果
-
 CSS的编写位置 行内样式**<!DOCTYPE html> <html lang="zh-CN"> <head> <meta charset="UTF-8"> <title>位置1_行内样式</title> </head> <body> <h1 style="color: green; font-size: 60px;">你好,孙笑川!</h1> </body> </html>2. 内部样式<!DOCTYPE html> <html lang="zh-CN"> <head> <meta charset="UTF-8"> <title>位置2_内部样式</title> <style> h1{ color: lightgreen; font-size: 60px; } h2{ color: orange; font-size: 30px; } p{ color: lightcoral; font-size: 25px; } img{ width: 400px; } </style> </head> <body> <h1>你好,孙笑川!</h1> <h2>大家好,我是药水哥!</h2> <p>北京欢迎你</p> <p>上海欢迎你</p> <p>广州欢迎你</p> <img src="../images/IMG_0003.JPG" alt="照片"> </body> </html>3. 外部样式position.cssh1{ color: lightgreen; font-size: 60px; } h2{ color: orange; font-size: 30px; } p{ color: lightcoral; font-size: 25px; } img{ width: 400px; }<!DOCTYPE html> <html lang="zh-CN"> <head> <meta charset="UTF-8"> <title>位置2_内部样式</title> <link rel="stylesheet" href="./position.css"> </head> <body> <h1>你好,孙笑川!</h1> <h2>大家好,我是药水哥!</h2> <p>北京欢迎你</p> <p>上海欢迎你</p> <p>广州欢迎你</p> <img src="../images/IMG_0003.JPG" alt="照片"> </body> </html>
 -
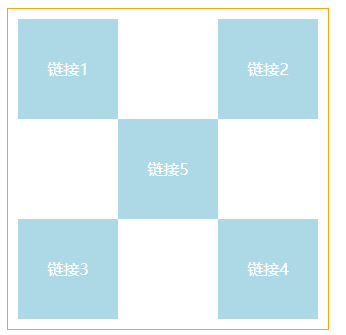
 定位 5.1 相对定位<!DOCTYPE html> <html lang="en"> <head> <meta charset="UTF-8"> <title>相对定位</title> <!--相对定位: 相对于自己原来的位置进行偏移 --> <style> body{ padding: 20px; } div{ margin: 10px; padding: 5px; font-size: 18px; line-height: 25px; } #father{ border: 1px solid #666; padding: 0; } #first{ background: #5f85ff; border: 1px dashed orange; position: relative; top: -10px; left: 20px; } #second{ background: #21D4FD; border: 1px dashed yellowgreen; } #third{ background: #ff23bd; border: 1px dashed limegreen; position: relative; bottom: -10px; right: 20px; } </style> </head> <body> <div id="father"> <div id="first">第一个盒子</div> <div id="second">第二个盒子</div> <div id="third">第三个盒子</div> </div> </body> </html>相对定位:position: relative;相对于原来的位置,进行指定的偏移(它任然在标准文档流中,原来的位置会被保留) top: -10px; bottom: -10px; left: 20px; right: 20px;Demo:<!DOCTYPE html> <html lang="en"> <head> <meta charset="UTF-8"> <title>Title</title> <style> #box{ width: 300px; height: 300px; padding: 10px; border: 1px solid red; } a{ width: 100px; height: 100px; text-decoration: none; background: lightblue; line-height: 100px; text-align: center; color: white; display: block; } a:hover{ background: lightsalmon; } .a2,.a4{ position: relative; left: 200px; top: -100px; } .a5{ position: relative; left: 100px; top: -300px; background: #5f85ff; } </style> </head> <body> <div id="box"> <a class="a1" href="#">链接1</a> <a class="a2" href="#">链接2</a> <a class="a3" href="#">链接3</a> <a class="a4" href="#">链接4</a> <a class="a5" href="#">链接5</a> </div> </body> </html>5.2 绝对定位基于xxx定位:上下左右1、在没有父级元素定位的情况下,相对于浏览器定位2、父级元素定位存在时,相对于父级元素进行偏移3、在父级元素范围内移动相对于父级或浏览器的位置进行指定偏移,绝对定位后,不在标准文档流中,原来的位置不被保留<!DOCTYPE html> <html lang="en"> <head> <meta charset="UTF-8"> <title>Title</title> <style> div{ margin: 10px; padding: 5px; font-size: 18px; line-height: 25px; } #father{ border: 1px solid #666; padding: 0; position: relative; } #first{ background: #5f85ff; border: 1px dashed orange; } #second{ background: #21D4FD; border: 1px dashed yellowgreen; position: absolute; left: 2px; } #third{ background: #ff23bd; border: 1px dashed limegreen; } </style> </head> <body> <div id="father"> <div id="first">第一个盒子</div> <div id="second">第二个盒子</div> <div id="third">第三个盒子</div> </div> </body> </html>5.3 固定定位<!DOCTYPE html> <html lang="en"> <head> <meta charset="UTF-8"> <title>Title</title> <style> body{ height: 1200px; } /*绝对定位:相对于浏览器*/ div:nth-of-type(1){ width: 100px; height: 100px; background: red; position: absolute; right: 0; bottom: 0; } /*fixed 固定定位*/ div:nth-of-type(2){ width: 50px; height: 50px; background: yellow; position: fixed; right: 0; bottom: 0; } </style> </head> <body> <div>div1</div> <div>div2</div> </body> </html>5.4 z-index图层opacity: 0.5; 背景透明度#content{ width: 500px; padding: 0; margin: 0; overflow: hidden; font-size: 18px; line-height: 25px; border: 1px solid black; } ul,li{ padding: 0; margin: 0; list-style: none; } /*父级元素相对定位*/ #content ul{ position: relative; } .tipText,.tipBg{ position: absolute; width: 500px; height: 25px; top: 401px; } .tipText{ color: white; /*z-index: 999;*/ } .tipBg{ background: black; opacity: 0.5;/*背景透明度*/ filter: alpha(opacity=50);/*IE8及以前用filter代替opacity*/ }<!DOCTYPE html> <html lang="en"> <head> <meta charset="UTF-8"> <title>Title</title> <link rel="stylesheet" href="css/style.css" type="text/css"> </head> <body> <div id="content"> <ul> <li><img src="image/bg.jpg" alt=""></li> <li class="tipText">强风吹拂!</li> <li class="tipBg"></li> <li>时间:16点31分</li> <li>地点:bilibili</li> </ul> </div> </body> </html>
 -
 浮动 1.1标准文档流块级元素:独占一行h1~h6,p,div,列表……行内元素:不独占一行span,a,img,strong……行内元素可以被包含在块级元素中,反之不行1.2 display<!-- block 块元素 inline 行内元素 inline-block 是块元素,但是可以内联(可以有行内元素的属性),在一行 --> <style> div{ width: 100px; height: 100px; border: 1px solid red; display: inline; } span{ width: 100px; height: 100px; border: 1px solid red; display: inline-block; } </style>注:display也是实现行内元素排列的一种方式,但通常情况下float使用较多。1.3 floatdiv{ margin: 10px; padding: 5px; } #father{ border: 1px solid red; } .layer01{ border: 1px solid red; display: inline-block; float: right; } .layer02{ border: 1px solid red; display: inline-block; float: right; } .layer03{ border: 1px solid red; display: inline-block; float: right; } .layer04{ border: 1px solid red; font-size: 16px; line-height: 24px; display: inline-block; float: right; }1.4 父级边框塌陷问题clear/* clear: right; 右侧不允许有浮动元素 clear: left; 左侧不允许有浮动元素 clear: both; 两侧不允许有浮动元素 clear: none; */ .layer04{ border: 1px solid red; font-size: 16px; line-height: 24px; display: inline-block; float: right; clear: right; }解决方案:1、增加父级元素的高度#father{ border: 1px solid cornflowerblue; height: 800px; }2、增加一个空的div标签,清除浮动.clear{ clear: none; margin: 0; padding: 0; } <div class="clear"></div>3、overflow/*在父级元素中,增加一个 overflow: hidden;方法*/ #father{ border: 1px solid cornflowerblue; overflow: hidden; }4、在父类添加一个伪类:after#father:after{ content: ''; display: block; clear: both }小结:浮动元素后面增加空div简单,但需注意代码中尽量避免空div设置父元素的高度如果元素有固定高度,会被限制overflow在下拉的一些场景中避免使用父类添加一个伪类:after(推荐使用)display:方向不可以控制float:浮动起来后会脱离标准文档流,需解决父级边框塌陷问题
 -
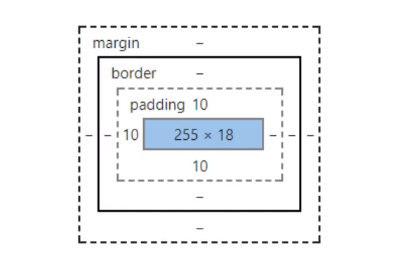
 盒子模型 1.1 什么是盒子模型margin:外边距padding:内边距border:边框1.2 边框1、边框的粗细2、样式3、颜色1.3 内外边距<!DOCTYPE html> <html lang="en"> <head> <meta charset="UTF-8"> <title>Title</title> <!--外边距的作用:居中元素 margin: 0 auto; --> <style> #box{ width: 300px; border: 2px solid red; margin: 0 auto; } /* 顺时针旋转 margin: 0; margin: 0 1px; margin: 0 1px 2px 3px; */ h2{ font-size: 18px; background: orangered; line-height: 30px; color: white; } form{ background: lightgray; } input{ border: 1px solid black; } div:nth-of-type(1){ margin: 2px 2px; } </style> </head> <body> <div id="box"> <h2>登录</h2> <form action="#"> <div> <span>用户名:</span> <input type="text"> </div> <div> <span>密码:</span> <input type="password"> </div> </form> </div> </body> </html>盒子的计算方式:margin + border + padding +内容的宽度1.4 圆角边框 <style> div{ width: 100px; height: 100px; border: 1px solid red; border-radius: 10px; } </style>1.5 盒子阴影<!DOCTYPE html> <html lang="en"> <head> <meta charset="UTF-8"> <title>Title</title> <style> img{ border-radius: 50px; box-shadow: 5px 5px 100px yellow; } </style> </head> <body> <div style="width: 500px;height: 500px;text-align: center"> <img src="image/1.JPG" alt=""> </div> </body> </html>
 -
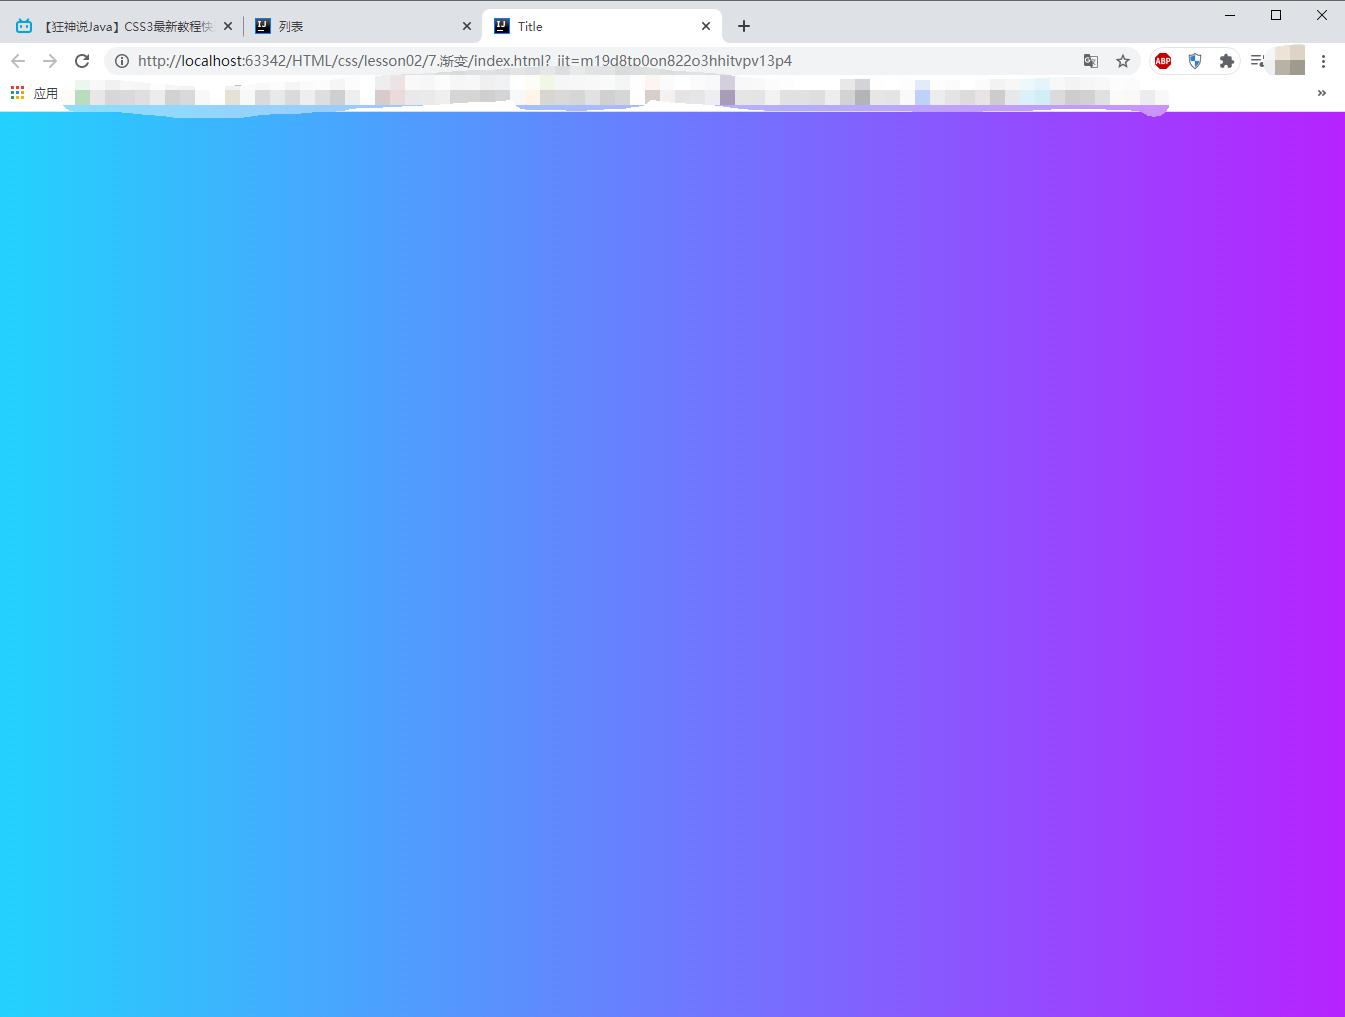
 美化网页(CSS) 1.1 字体样式<!-- font-family:字体 font-size:大小 font-weight: 字体粗细 --> <style> body{ font-family: "Agency FB",楷体; color: #5f85ff; } h1{ font-size: 50px; } .p1{ font-weight: inherit; } </style>1.2 文本样式1、颜色 color rgb rgba2、文本对齐方式 text-align:center3、首行缩进 text-indent:2em4、行高 line-height(单行文字上下居中 line-height = height)5、装饰 text-decoration6、文本图片水平对齐 vertical-align: middle;<!DOCTYPE html> <html lang="en"> <head> <meta charset="UTF-8"> <title>Title</title> <!-- 颜色: RGB 0~F RGBA A:0~1 text-align: 排版 text-indent: 2em;段落首行缩进 line-height: 30px; 行高 行高 和 块的高度一致,就可以上下居中 --> <style> h1{ color: rgba(0,255,255,0.8); text-align: center; } .p1{ text-indent: 2em; } .p2{ background: #5f85ff; height: 50px; line-height: 50px; } /* underline:下划线 line-through:中划线 overline:上划线 */ .p3{ text-decoration: underline; } .p4{ text-decoration: line-through; } .p5{ text-decoration: overline; } /*超链接去下划线*/ a{ text-decoration: none; } /*文字图片水平对齐*/ img,p{ vertical-align: middle; } </style> </head> <body> <h1>棕熊盖房子</h1> <p class="p1"> 冬天快来了,棕熊想:我要在森林里盖一座房子,这样冬天我就不用睡在外面,就可以呆在自己的屋子里一边吃东西,一边读自己喜欢读的书了! </p> <p class="p2"> 冬天快来了,棕熊想:“我要在森林里盖一座房子,这样冬天我就不用睡在外面,就可以呆在自己的屋子里一边吃东西,一边读自己喜欢读的书了!”不过,怎么盖呢?盖成什么样子呢? 棕熊想:“我该请别的朋友给我出出主意!” </p> <br/> <p class="p3">123321</p> <p class="p4">123321</p> <p class="p5">123321</p> <a href="#">123321</a> <p> <img src="../3.文本样式/image/1.png" width="900px" height="805" alt=""> <span>无间道</span> </p> </body> </html>1.3 阴影/*text-shadow:水平偏移,垂直偏移,阴影半径,颜色*/ #price{ text-shadow:5px 5px 2px lightblue; }1.4 超链接伪类常用的 a,a:hover/*默认颜色*/ a{ text-decoration: none; color:black; } /*鼠标悬浮的状态*/ a:hover{ color: #5f85ff; font-size: 24px; } /*鼠标按住未释放的状态*/ a:active{ color: orange; } /*已访问的链接*/ a:visited{ color: #ff23bd; }1.5 列表/*ul,li*/ /* list-style: none;去掉无序列表圆点 circle 空心圆 decimal 数字 */ ul li{ height: 30px; list-style: none; text-indent: 1em; }1.6 背景背景颜色背景图片 <style> div{ width: 1000px; height: 700px; border: 1px solid red; /*默认全部平铺*/ background-image: url("image/1.JPG"); } .div1{ background-repeat: repeat-x; } .div2{ background-repeat: repeat-y; } .div3{ background-repeat: no-repeat; } </style>1.7 渐变background: linear-gradient(19deg, #21D4FD 0%, #B721FF 100%);
 -
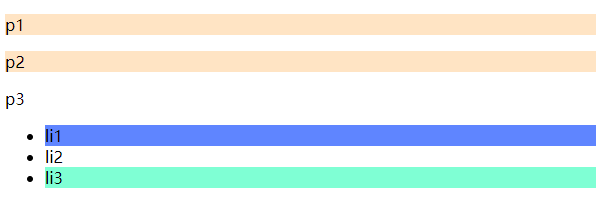
 CSS选择器 选择页面上的某一个或某一类元素1.1 基本选择器标签选择器:选择一类标签 标签{}<!DOCTYPE html> <html lang="en"> <head> <meta charset="UTF-8"> <title>基本选择器</title> <style> /*标签选择器,会选择到页面上所有的h1标签(以h1标签为例)*/ h1{ color: red; background-color: aquamarine; border-radius: 15px; } </style> </head> <body> <h1>CSS学习</h1> <p>学习CSS</p> <h1>CSS学习</h1> </body> </html>类选择器:选择所有class属性一致的标签,跨标签 .类名{}<!DOCTYPE html> <html lang="en"> <head> <meta charset="UTF-8"> <title>Title</title> <!--类选择器 语法: .class的名称{} 可以多个标签归类(同一个class),可以复用 --> <style> .test01{ color: #5f85ff; } .test02{ font-family: '方正舒体'; color: #ff23bd; } </style> </head> <body> <h1 class="test01">类选择器</h1> <h1 class="test02">类选择器</h1> <h1 class="test01">类选择器</h1> <p class="test01">类选择器</p> </body> </html>id选择器:全局唯一 #id名{}<!DOCTYPE html> <html lang="en"> <head> <meta charset="UTF-8"> <title>id选择器</title> <!--id选择器 语法:#id名称{} 优先级:不遵循就近原则(固定的) id选择器 > class选择器 > 标签选择器 --> <style> #test01{ color: #5f85ff; } .test02{ color: aquamarine; } h1{ color: red; } </style> </head> <body> <h1 id="test01">id选择器</h1> <h1 class="test02">id选择器</h1> <h1 class="test02">id选择器</h1> <h1>id选择器</h1> <h1>id选择器</h1> </body> </html>优先级:id > class > 标签1.2 层次选择器1、后代选择器:在某个元素的后面 祖父--父母--自己/*后代选择器*/ body p{ background-color: #5f85ff; }2、子选择器:一代--儿子/*子选择器*/ body>p{ background-color: red; }3、相邻兄弟选择器:同辈/*相邻兄弟选择器:只有一个,相邻(向下)*/ .active + p{ background-color: aqua; }4、通用选择器/*通用选择器,当前选中元素的向下的所有兄弟元素*/ .active~p{ background-color: azure; }1.3 结构伪类选择器伪类:条件/*ul的第一个子元素*/ ul li:first-child{ background-color: #5f85ff; } /*ul的最后一个子元素*/ ul li:last-child{ background-color: aquamarine; } /* 选中p1:定位到父元素,选择当前的第一个元素 选择当前p元素的父级元素,选中父级元素的第一个,并且是当前元素才生效 */ p:nth-child(2){ background-color: bisque; } /*选中父元素,下的p元素的第二个类型*/ p:nth-of-type(1){ background-color: bisque; }<!DOCTYPE html> <html lang="en"> <head> <meta charset="UTF-8"> <title>结构伪类选择器</title> <style> /*ul的第一个子元素*/ ul li:first-child{ background-color: #5f85ff; } /*ul的最后一个子元素*/ ul li:last-child{ background-color: aquamarine; } /* 选中p1:定位到父元素,选择当前的第一个元素 选择当前p元素的父级元素,选中父级元素的第一个,并且是当前元素才生效 */ p:nth-child(1){ background-color: bisque; } /*选中父元素,下的p元素的第一个类型*/ p:nth-of-type(2){ background-color: bisque; } /*a:hover{*/ /* background-color: #5f85ff;*/ /*}*/ </style> </head> <body> <!--<a href="#">123321</a>--> <!--<h1>h1</h1>--> <p>p1</p> <p>p2</p> <p>p3</p> <ul> <li>li1</li> <li>li2</li> <li>li3</li> </ul> </body> </html>1.4 属性选择器id+class结合<!DOCTYPE html> <html lang="en"> <head> <meta charset="UTF-8"> <title>属性选择器</title> <style> .test a{ float: left; display: block; height: 50px; width: 50px; border-radius: 8px; background-color: #5f85ff; text-align: center; color: black; text-decoration: none; margin-right: 5px; font: bold 20px/50px Arial; } /* 属性名,属性名 = 属性值(正则) = 绝对等于 *= 包含这个元素 ^= 以xxx开头 &= 以xxx结尾 */ /* 有id属性的元素 a[]{} */ /*a[id]{*/ /* background-color: yellow;*/ /*}*/ /* id = test01的元素 */ /*a[id=test01]{*/ /* background-color: yellow;*/ /*}*/ /* class中有links的元素 */ /*a[class *= "links"]{*/ /* background-color: yellow;*/ /*}*/ /* 选中herf中以http开头的元素 */ /*a[href ^= "http"]{*/ /* background-color: yellow;*/ /*}*/ a[href $= "abc"]{ background-color: yellow; } </style> </head> <body> <p class="test"> <a href="http://www.baidu.com" class="links item" id="test01">1</a> <a href="image/123.jpg" class="links image" id="test02">2</a> <a href="image/123.png">3</a> <a href="abc">4</a> <a href="/a.pdf">5</a> <a href="/b.doc">6</a> <a href="abc.abc">7</a> </p> </body> </html>= 绝对等于 *= 包含xxx ^= 以xxx开头 $= 以xxx结尾
 -
 CSS导入方式 CSS导入方式:<!DOCTYPE html> <html lang="en"> <head> <meta charset="UTF-8"> <title>Title</title> <!--2、内部样式--> <style> h1{ color: red; } </style> <!--3、外部样式--> <link rel="stylesheet" href="css/style.css"> </head> <body> <!--优先级:就近原则--> <!--1、行内样式,在标签元素中,编写一个style属性,编写样式即可--> <h1 style="color: aqua">标题</h1> </body> </html>行内样式<h1 style="color: aqua">标题</h1>内部样式<style> h1{ color: red; } </style>链接式<link rel="stylesheet" href="css/style.css">导入式@import CSS 2.1特有<style> @import url("css/style.css"); </style>


